I've been seeing a lot of awesome Halloween paper lanterns recently -- like
these,
these,
these and
these from Pottery Barn, and
these, for example. But instead of paying between $10 and $25 for some readymade lanterns, I decided to try my hand at making my own, so I bought a $5 string of paper lanterns at my local Five Below and got to work. What I wound up with is, I think, fun and customizable, and much more personal than the store-bought versions.
You Will Need:
A string of lighted paper lanterns
Glow-in-the-dark acrylic paint
Paint brush
Paint receptacle (I used a takeout lid)
Pencil
Sharpie
Scissors
Halloweeny templates or stencils
Newsprint-covered work surface
Untangle your lanterns and spread them out on a newspaper-covered work surface.
Brush a coat of glow-in-the-dark paint onto each lantern. Let this dry, then repeat. I used two coats, and my lanterns glow very faintly in the dark. If you want a more robust glow, you may want to do three or four coats.
While your paint is drying, decide what images you want to put on your lanterns. I used
this bat from
Good Housekeeping and
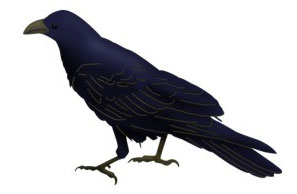
this raven. You could also do spiders, haunted houses, or whatever else your spooky heart desires. Resize your images to fit and cut them out.

Once the paint is dry, hold your stencils up to the lanterns and trace the outline with a pencil. (The duller the pencil, the better, so you don't poke holes in the paper!) I fit two images on each lantern, and alternated the pattern, but you can arrange them any way you like.
Color in your outlines with Sharpie. You could also fill them in with black paint, but I feel like I have more control with a pen, and I also wound up liking the kind of distressed-looking results of the streaky ink.
Once the ink is dry, you're ready to hang your lanterns and admire! Be sure to expose the lanterns to a generous dose of light to activate the glow-in-the-dark paint.
I suspect that you could also cut your spooky shapes out of black tissue paper and paste them onto your lanterns if you so chose, although that seems a bit more fiddly to me, and doesn't involve the dubious pleasures of a marker high. It would also be fun to find some orange lanterns and do Jack-o-hanging-lanterns. Next time, perhaps!
Also, if you're really not in a DIY mood, Five Below has the best deal I've seen on Halloween lanterns, with $5 strings of Halloween-print lanterns. You can locate the nearest store
here.


 Once the paint is dry, hold your stencils up to the lanterns and trace the outline with a pencil. (The duller the pencil, the better, so you don't poke holes in the paper!) I fit two images on each lantern, and alternated the pattern, but you can arrange them any way you like.